Bake Fluffy Mini Quiches: Secrets to a Perfect Crust & Filling
Imagine a brunch spread where perfectly golden, bite-sized quiches beckon, promising a creamy, savory filling encased in a delicate, flaky crust. These aren't just any egg bites; these are fluffy mini quiches, and mastering them is easier than you think. Whether you're planning a sophisticated brunch, packing wholesome lunchbox treats, or simply looking for an effortless meal prep solution, a great mini quiche recipe is your culinary superpower. What makes them truly special is their incredible versatility, allowing you to infuse your favorite flavors into every delicious morsel.
This comprehensive guide will unlock the secrets to achieving that ideal balance of a tender, custardy filling and a beautifully crisp, non-soggy crust. We'll explore ingredient choices, expert techniques, and practical tips to ensure your mini quiches turn out flawless every time. Get ready to impress yourself and your guests with these delectable little cups!
The Allure of Fluffy Mini Quiches: Why These Bites Win Every Time
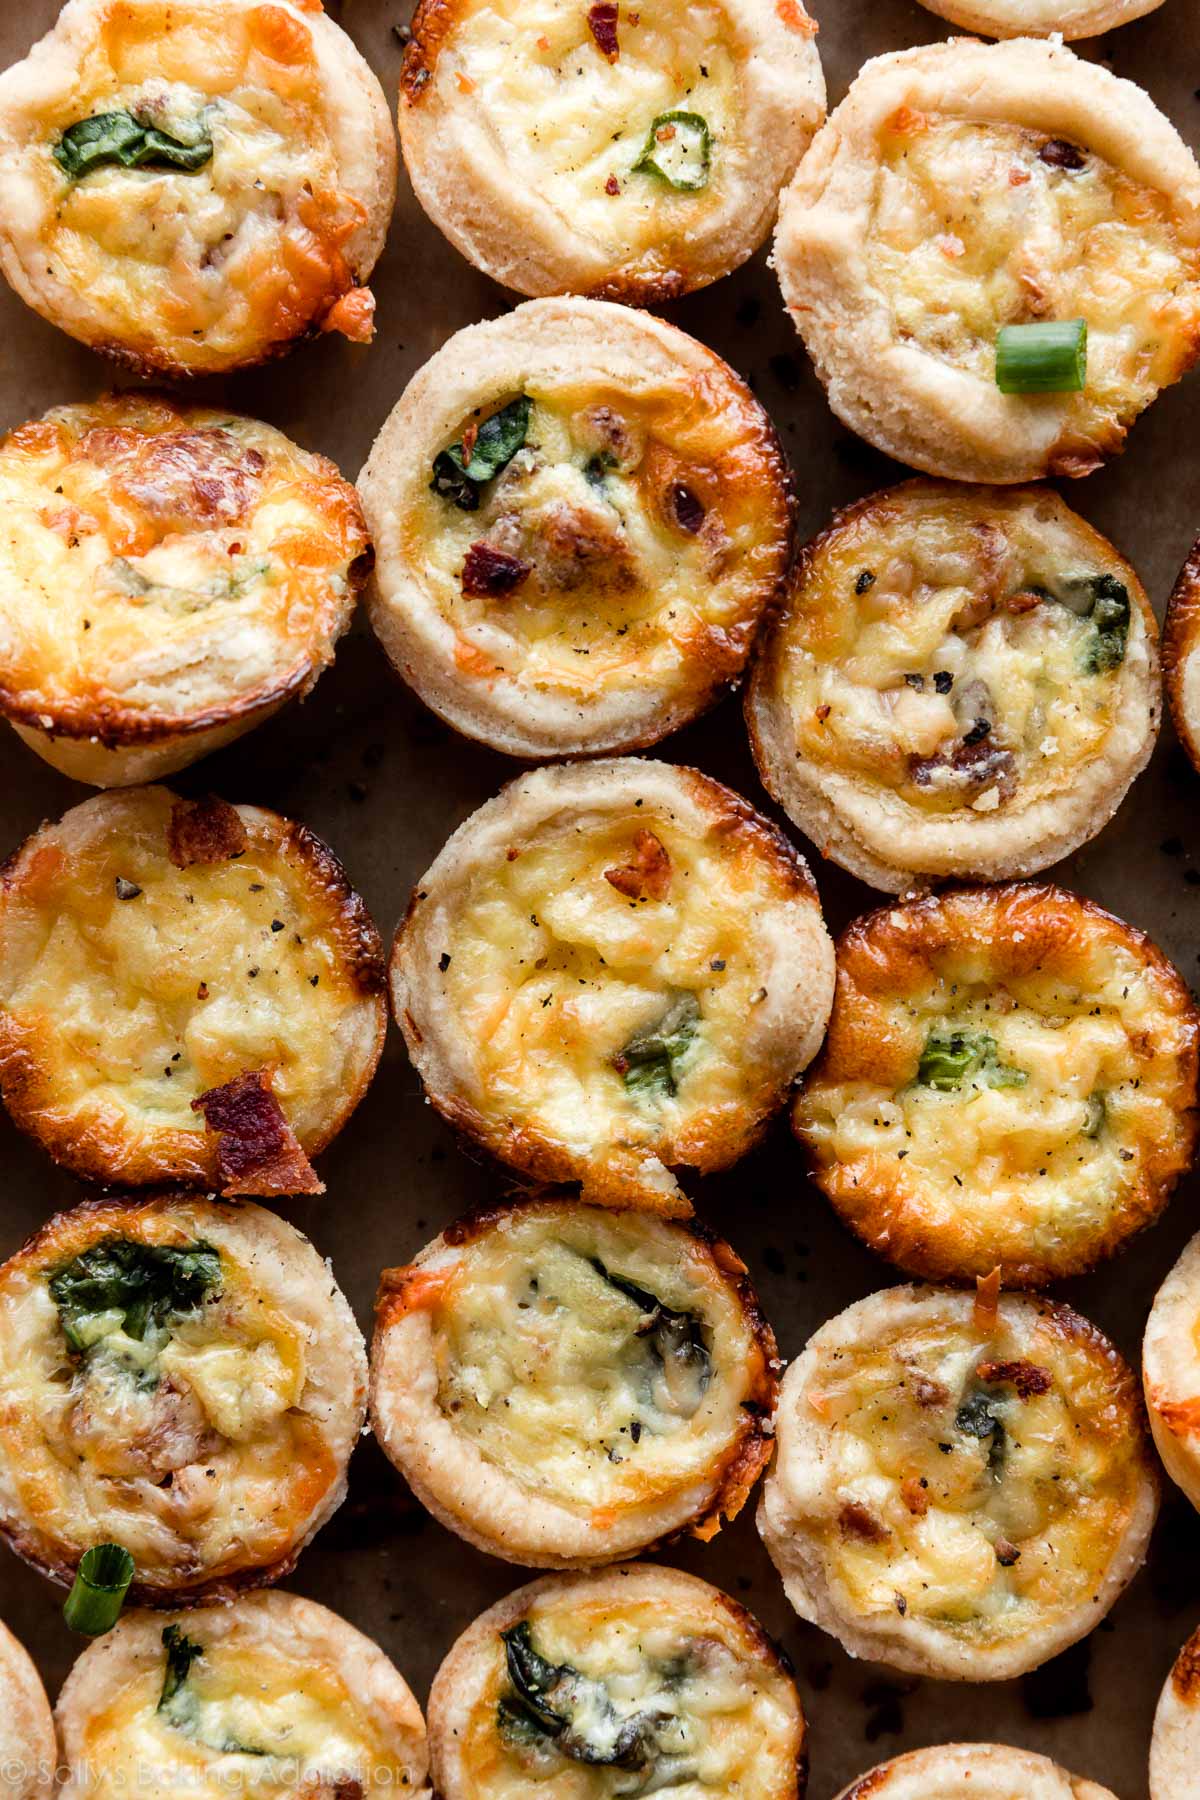
Mini quiches have undeniably captured the hearts (and stomachs) of food lovers everywhere, and for good reason. Their appeal lies in a perfect storm of convenience, flavor, and visual charm. Unlike their larger counterparts, mini quiches bake up in a fraction of the time, typically achieving that desirable golden-brown finish and fluffy texture in just 20-25 minutes. This speed makes them an ideal candidate for last-minute gatherings or a quick, satisfying breakfast on busy mornings. The individual portions are also inherently elegant, making them a fantastic addition to party platters or a sophisticated brunch spread without requiring hours in the kitchen.
One of the most celebrated aspects of a good mini quiche recipe is its inherent adaptability. You can truly make these your own, custom-fitting them to dietary preferences, seasonal ingredients, or whatever ingredients you happen to have on hand. Beyond their aesthetic and practical benefits, these little bites deliver a satisfying combination of textures: a buttery crust that holds its own, giving way to a rich, creamy filling that tastes far more indulgent than the effort involved. They're excellent for meal prepping, easily stored and reheated, providing a grab-and-go option for the week ahead. Pin this Easy Mini Quiche Recipe: Perfect for Brunch & Quick Meal Prep for your next cooking session!
Unveiling the Essential Ingredients for Your Mini Quiche Masterpiece
The beauty of a classic mini quiche recipe lies in its simple, wholesome components that come together to create something extraordinary. Let's break down the star players:
- Large Eggs: The Foundation of Fluffiness
Eggs are, without a doubt, the protagonist of any quiche. They provide the essential structure and protein, creating that delightful, custardy texture. Opting for organic, free-range eggs often yields richer yolks and superior flavor. For optimal fluffiness, ensure your eggs are at room temperature before whisking. - Milk or Cream: The Creaminess Factor
This liquid component transforms the egg mixture into a silky, tender custard. While any milk (dairy or non-dairy like almond milk) will work, using half-and-half or even heavy cream will elevate the richness and create an even more luxurious mouthfeel. The milk-to-egg ratio is critical for preventing a rubbery texture; too much egg and not enough liquid can lead to a dense, tough quiche. - Diced Vegetables: Your Canvas for Creativity
Here's where you truly unleash your culinary imagination! Common choices include bell peppers, spinach (sautéed and squeezed dry), onions, mushrooms, zucchini, cherry tomatoes, or asparagus. Remember to dice your vegetables finely and, for high-moisture options like mushrooms or spinach, give them a quick sauté to remove excess water. This prevents your quiches from becoming watery. - Cooked Meats (Optional): A Savory Boost
For those who enjoy a heartier bite, cooked and crumbled sausage, diced ham, crispy bacon bits, or even smoked salmon can add incredible depth of flavor and protein. If you're vegetarian, simply omit the meat – your quiches will still be incredibly satisfying. - Shredded Cheese: The Gooey Goodness
Who can resist melted cheese? Cheddar is a classic, but don't shy away from experimenting with Gruyère for a nutty depth, mozzarella for stretchiness, feta for a salty tang, or even goat cheese for a creamy, earthy note. A blend of cheeses often works wonders. - Salt and Pepper: The Flavor Enhancers
Simple seasonings are key to bringing out the best in your ingredients. Don't be afraid to be generous, but always taste as you go. A pinch of nutmeg can also add a classic, subtle warmth to the egg custard, and fresh herbs like chives or thyme offer a bright, aromatic finish. - Phyllo or Puff Pastry: The Easy, Flaky Crust
This is your secret weapon for achieving a professional-looking, flaky crust without the fuss of making dough from scratch. Both phyllo and puff pastry offer incredible texture and a beautiful golden finish. We'll delve into the specifics of working with them next. - Cooking Spray or Olive Oil: The Non-Stick Assurance
A simple but crucial step to ensure your precious mini quiches slide out of the muffin tin effortlessly.
Crafting the Perfect Crust: Secrets to Flaky, Non-Soggy Bites
The crust is half the magic of a perfect mini quiche. A soggy bottom is the bane of any quiche lover, but with the right techniques and pastry choice, you can ensure your crust is always crisp and delightful.
Choosing Your Pastry: Puff Pastry vs. Phyllo
- Puff Pastry: Offers a rich, buttery flavor and a wonderfully airy, layered texture when baked. It's forgiving to work with and creates a substantial crust. Thaw it according to package directions, then roll it slightly thinner if desired, and cut into circles or squares larger than your muffin cups.
- Phyllo Dough: Provides a lighter, incredibly delicate, and super-crispy crunch. It requires a bit more finessing as it's thin, but layering several sheets (brushing lightly with melted butter or oil between layers for richness) into the muffin cups creates a stunning, shattered crust.
Preventing the Dreaded Soggy Bottom
- Pre-bake (Blind Bake) the Crust (Optional, but recommended for extra crispness): For ultimate crispness, especially with puff pastry, you can pre-bake the cut pastry shells for about 5-7 minutes before adding the filling. This helps to dry out the dough and create a barrier against the wet filling.
- Chill Your Pastry: Keep your pastry cold until you're ready to press it into the muffin tin. Cold pastry bakes up flakier.
- Don't Overfill: Overfilling can cause the filling to seep under the crust, leading to sogginess. Leave a little room at the top.
- Brush with Egg Wash: For puff pastry, brushing the inside of the pastry shells with a thin layer of egg wash (beaten egg with a splash of water) before filling can create a protective layer against moisture.
For those looking for a healthier or lower-carb option, skipping the pastry entirely is a fantastic alternative. You can use thinly sliced sweet potatoes or even eggplant as a base, or simply bake them crustless in well-greased muffin tins. This approach makes for truly Customizable Mini Quiche: Healthy, Protein-Packed Breakfast Bites, packed with protein and nutrients.
Achieving the Ideal Filling: Tender, Custardy, Never Rubbery
The secret to a luscious, tender quiche filling lies in understanding the delicate balance of ingredients and precise baking techniques. No one wants a rubbery egg cup!
The Perfect Egg-to-Milk Ratio
For every large egg, aim for about 2-3 tablespoons of milk or cream. This ratio ensures a custardy texture. Too many eggs and not enough liquid will result in a denser, firmer, and potentially rubbery quiche. Conversely, too much liquid can make the filling too loose and prone to cracking.
Whisking Technique Matters
Whisk your eggs and milk/cream vigorously but not excessively. You want to incorporate air for fluffiness, but too much air can lead to a puffy quiche that collapses dramatically after baking. Whisk until just combined and slightly frothy.
Ingredient Prep for a Smooth Filling
- Drain and Sauté: As mentioned, always sauté high-moisture vegetables like spinach, mushrooms, or onions. Allow them to cool slightly, then squeeze out any excess liquid. This prevents your quiches from becoming watery and compromising the custard.
- Dice Small: Ensure all your add-ins – vegetables, meats, and cheeses – are diced into small, uniform pieces. This allows for even distribution throughout the quiche and ensures each bite is balanced.
The Goldilocks Oven Temperature & Baking Time
Oven temperature is critical for quiche. A moderate temperature, like 375°F (190°C), allows the custard to set gently without overcooking and becoming rubbery. These little bites typically bake up golden and fluffy in just 20-25 minutes. Overcooking is the primary culprit behind rubbery eggs, so keeping a watchful eye is essential.
The Doneness Test
How do you know when your mini quiches are perfectly baked? Gently jiggle the muffin tin. The edges of the quiches should be set, but the very center should still have a slight, barely perceptible wobble. It will continue to set as it cools. If there's no wobble at all, they might be slightly overcooked.
Allowing the mini quiches to rest in the muffin tin for 5-10 minutes after baking helps them firm up further and makes them easier to remove.
Step-by-Step Guide: Your Foolproof Mini Quiche Recipe
Ready to bake? Follow this simple yet detailed guide for your perfect batch of fluffy mini quiches.
- Preheat & Prepare: Preheat your oven to 375°F (190°C). Generously spray your 12-cup muffin tin with cooking spray or lightly brush with olive oil. This is a crucial step for easy release.
- Crust Creation: If using puff pastry, thaw it, lightly flour your surface, and roll it slightly thinner if desired. Use a round cookie cutter or a glass to cut circles that are about an inch wider than your muffin cups. For phyllo, gently layer 3-4 sheets, lightly brushing with melted butter/oil between each layer, then cut into squares or circles. Carefully press each pastry circle or stack into the prepared muffin cups, gently molding them to the shape.
- Whisk the Base: In a large mixing bowl, whisk together 8-10 large eggs (depending on the desired yield for 12 quiches) with about ¾ to 1 cup of milk or cream. Whisk until well combined and slightly foamy, but don't over-aerate.
- Season & Flavor: Stir in 1 teaspoon of salt and ½ teaspoon of freshly ground black pepper. This is also the time to add any other seasonings like a pinch of nutmeg or dried herbs.
- Fold in Fillings: Gently fold in your chosen diced vegetables (ensure they are pre-cooked and drained if necessary), cooked meats, and shredded cheese. Aim for about ½ cup of cheese and 1-1.5 cups of combined veggies/meat for 12 mini quiches, but adjust to your preference.
- Fill the Crusts: Carefully spoon the egg mixture into each pastry-lined muffin cup, filling them about ¾ full. Avoid overfilling, as this can lead to spillage and a messy, soggy crust.
- Bake to Perfection: Transfer the muffin tin to the preheated oven. Bake for 20-25 minutes, or until the quiches are golden brown on top, puffed up, and the center has a slight wobble when gently jiggled.
- Cool & Serve: Once baked, remove the muffin tin from the oven and let the mini quiches cool in the pan for 5-10 minutes. This allows them to set fully and makes them much easier to remove. Use a small offset spatula or butter knife to gently loosen the edges before lifting them out. Serve warm or at room temperature.
Make Ahead & Storage Tips
These mini quiches are fantastic for meal prep! You can make them the night before a brunch or party, allowing you to enjoy a stress-free morning. Once completely cooled, store them in an airtight container in the refrigerator for up to 3-4 days. For longer storage, freeze them individually on a baking sheet, then transfer to a freezer-safe bag for up to 1-2 months. Reheat in a preheated oven at 300°F (150°C) for 10-15 minutes or in a microwave for 30-60 seconds, until warmed through.
Is This Mini Quiche Recipe Healthy?
Absolutely! These mini quiches are not just delicious but can also be incredibly nutritious. Eggs are an excellent source of high-quality protein, essential vitamins (B12, D), and minerals. The diced vegetables add a powerful medley of vitamins, minerals, and antioxidants – think Vitamin C from bell peppers and iron from spinach. If you choose lean meats like turkey sausage or ham, you're adding more protein without excessive fat. To make them even healthier, consider using skim milk, reducing the amount of cheese, or opting for a crustless version. They are a fantastic, customizable option for a Customizable Mini Quiche: Healthy, Protein-Packed Breakfast Bites, fitting into various dietary needs with simple modifications.
Conclusion
Baking fluffy mini quiches is a truly rewarding culinary endeavor that offers incredible versatility and delicious results. By understanding the nuances of pastry preparation, ingredient ratios, and careful baking, you can consistently achieve that perfect balance of a flaky crust and a tender, custardy filling. Whether you're whipping up a batch for a special occasion, prepping for a busy week, or simply satisfying a craving for something savory and comforting, this mini quiche recipe is guaranteed to become a cherished favorite in your kitchen. So go ahead, experiment with your favorite fillings, embrace the ease, and enjoy every delightful bite!
